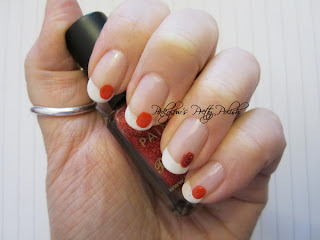
The apple has inspired my new design. I hope you like it and give it a go yourself by following my step by step guide.
What you will need:
- Base coat
- White polish
- Nude polish
- Red polish
- Red glitter polish
- Brown polish
- Green polish
- Top coat
- Cotton buds
- Nail dotting tool/thin paint brush
These are the polishes I used to create the look.
First, use a base coat to protect your natural nails and start the design by painting your nails with a simple French manicure. Paint the tips white and leave them to dry and add a coat of a nude colour.
Leave this to dry before moving on to the next step. To create the body of the apple I used red, but you could always choose green if you wanted. I also decided to make one of my apples sparkle for that extra special look, but you don't have to do this if you don't want to.
Take your red polish and drip some onto a scrap of paper. Using your cotton bud dip this into the polish and then add a red dot to your nail, slightly overlapping your French tip. Continue this on all your nails. I added the red glitter polish to my ring finger in the same way.
Again leave this to dry before moving on to the next step. To create the stalk of the apple you will need to use the nail dotting tool or thin paint brush. I have a double ended nail tool with both of these, so to create the stalk I used the brush. As with the body of the apple drip some of your brown polish onto a scrap of paper. Using your brush paint a small brown line moving away from the apple.
For the leaf I used the nail dotting tool, but you can use the brush if you want, just clean it using a small amount of polish remover on some cotton wool.
Drip a small about of your green polish onto your scrap of paper and using the dotting tool create a small dot by the brown line you just painted for the stalk. Drag the dot in the opposite direction to create the leaves. Do this on all your nails.
To finish, eave this to dry then add a thick layer of a top coat to protect your new design. You now have a back to school manicure.
Enjoy.


This is so cute! Absolutely perfect for everyone going back to school :)
ReplyDeleteOlivia xx
http://neverending-nailpolish.blogspot.com
Thank you! I wanted something that was really fun to wear but not too much for school x
Delete